
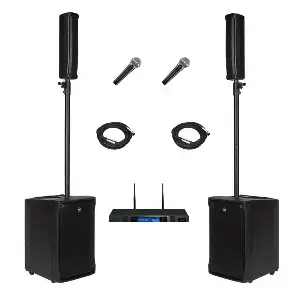
1 RCF J8 & 1 RCF JMIX + 2 Microphones
2 RCF J8 & 1 RCF JMIX + 2 Microphones
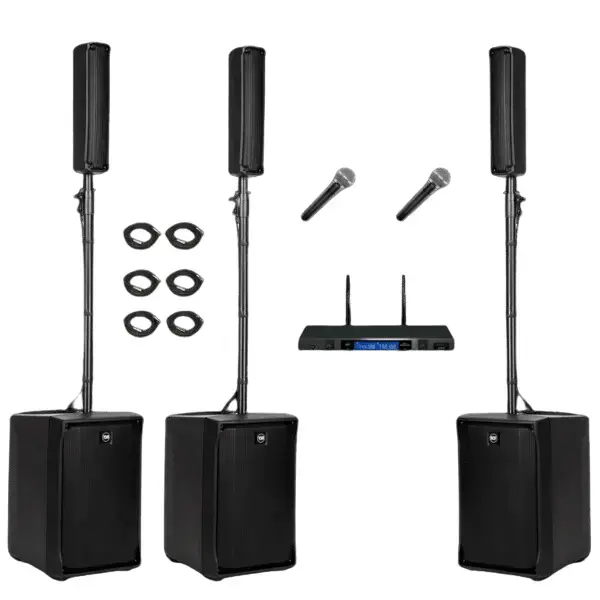
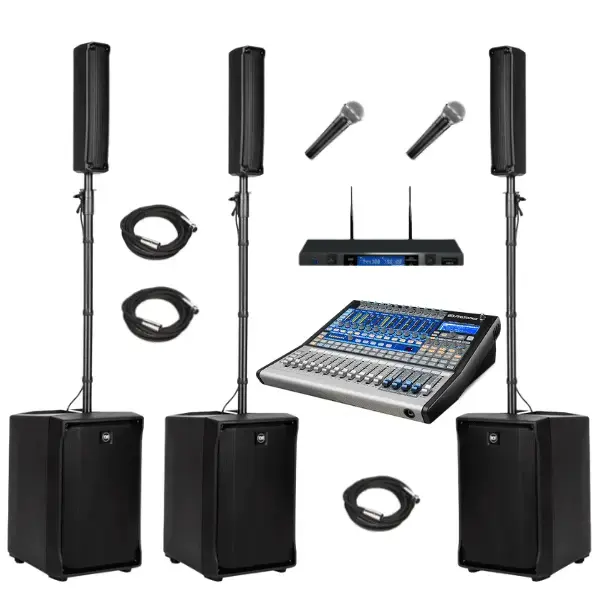
3 RCF J8 & 1 RCF JMIX + 2 Microphones
1 RCF J8 & 1 RCF JMIX + 16 Ch Mixer & 2 Mics
2 RCF J8 & 1 RCF JMIX + 16 Ch Mixer & 2 Mics
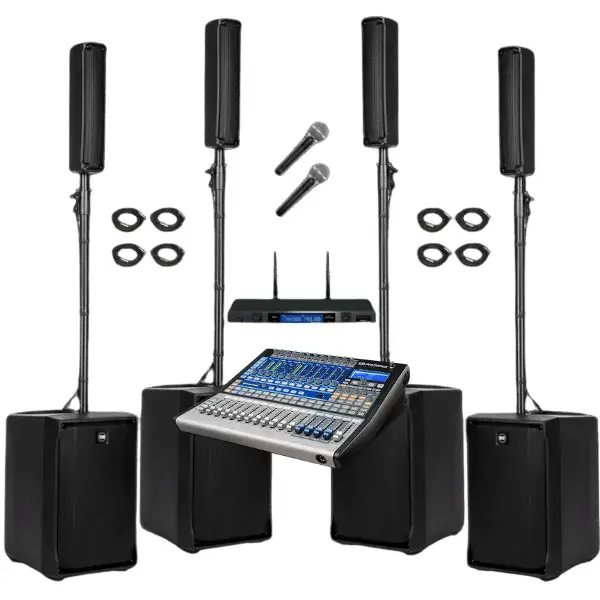
2 RCF J8 & 2 RCF JMIX + 16 Ch Mixer & 2 Mics
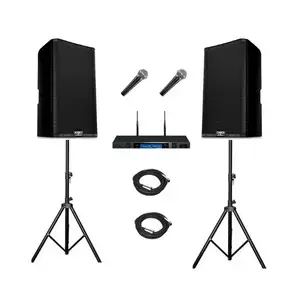
2 QSC K12.2 Speakers + 2 Wireless Mics
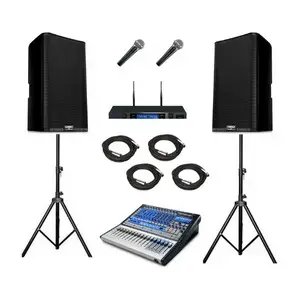
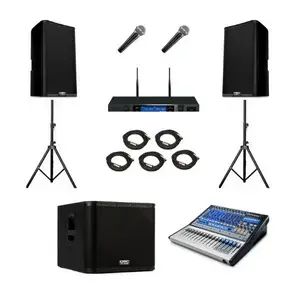
2 QSC K12.2 Speakers + 16Ch Mixer & 2 Mics
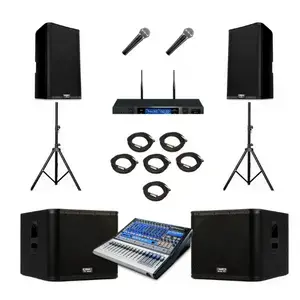
2 QSC K12.2 & 1 KW181 + 16Ch Mixer & 2 Mics
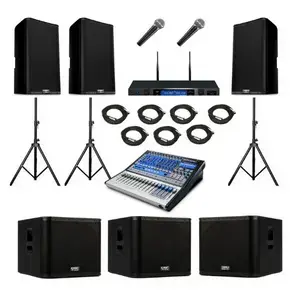
2 QSC K12.2 & 2 KW181 + 16Ch Mixer & 2 Mics
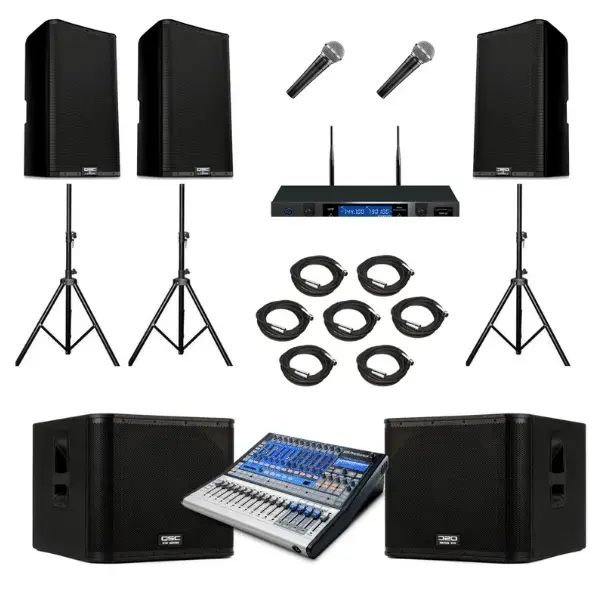
3 QSC K12.2 + 2 QSC KW181 + 16Ch Mixer & 4 Mics
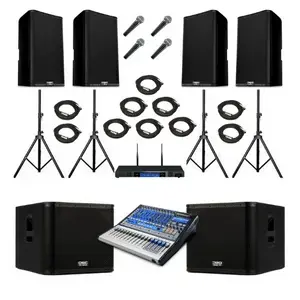
4 QSC K12.2 + 2 QSC KW181 + 16Ch Mixer & 4 Mics

2 QSC K12.2 + 3 QSC KW181 + 16Ch Mixer & 2 Mics
3 QSC K12.2 & 3 QSC KW181 + 16Ch Mixer & 2 Mics
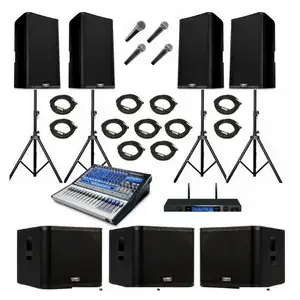
4 QSC K12.2 & 3 QSC KW181 + 16Ch Mixer & 4 Mics
2 QSC K12.2 & 4 QSC KW181 + 16Ch Mixer & 4 Mics
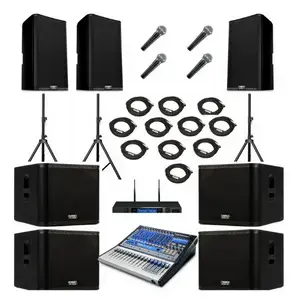
3 QSC K12.2 & 4 QSC KW181 + 16Ch Mixer & 4 Mics
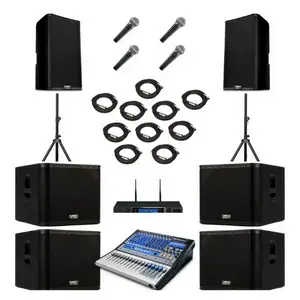
4 QSC K12.2 + 4 QSC KW181 + 16Ch Mixer & 2 Mics

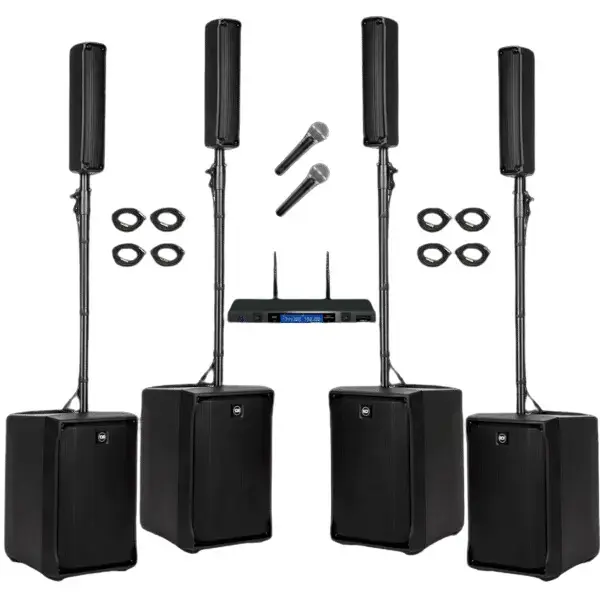
4 QSC K12.2 & 4 KW181 + 2 RCF J8 + Mixer & 4 Mics

4 QSC K12.2 & KW181 + 4 RCF J8 + Mixer & 4 Mics
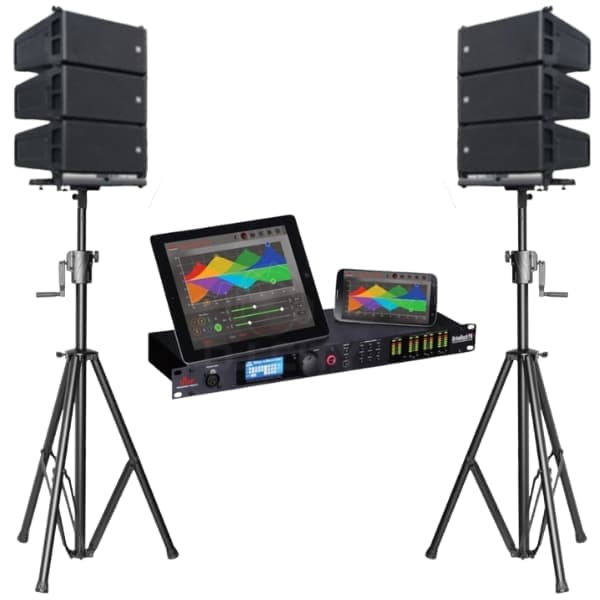
6 x RCF HDL 6 / DBX Drive Rack PA2 / Stands & cables included / No Mixer, Subwoofer & Microphones
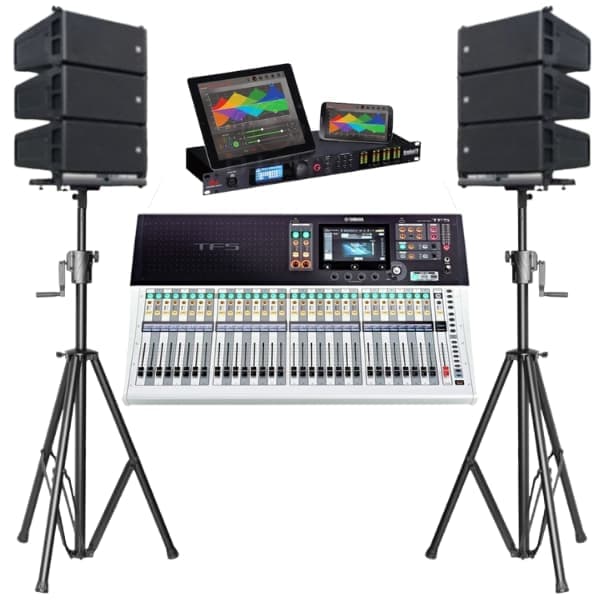
6 x RCF HDL 6 / DBX Drive Rack PA2 / Mixer / Stands & cables included / No Subwoofers & Microphones
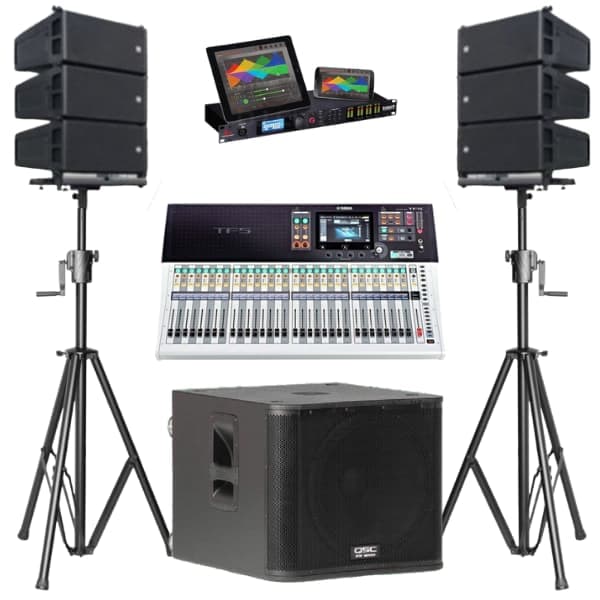
6 x RCF HDL 6 / 1 x QSC KW181 / DBX Drive Rack PA2 / Mixer / 4 x Microphones / Stands & cables
6 x RCF HDL 6 / 2 x QSC KW181 / DBX Drive Rack PA2 /Mixer / 4 x Microphones / Stands & cables included
6 x RCF HDL 6 / 3 x QSC KW181 / DBX Drive Rack PA2 / Mixer / 4 x Microphones / Stands & cables included
6 x RCF HDL 6 / 4 x QSC KW181 / DBX Drive Rack PA2 / Mixer / 4 x Microphones / Stands & cables included
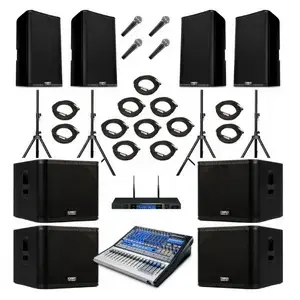
6 x RCF HDL 6 / 1 x RCF 8006 / DBX Drive Rack PA2 / Digital Mixer / 4 x Microphones
6 x RCF HDL 6 / 2 x RCF 8006 / Mixer / 4 x Microphones / Stands & cables included
6 x RCF HDL 6 / 1 x RCF 8006 + 2 x QSC W181 / DBX Drive Rack PA2 / Mixer / 4 x Microphones
6 x RCF HDL 6 / 1 x RCF 8006 / 3 x QSC KW181 / DBX Drive Rack PA2 / Mixer / 4 x Microphones
6 x RCF HDL 6 / 1 x RCF 8006 / 4 x QSC KW181 / DBX Drive Rack PA2 / Mixer / 4 x Microphones
6 x RCF HDL 6 / 2 x RCF 8006 / 1 x QSC KW181 / DBX Drive Rack PA2 / Mixer / 4 x Microphones
6 x RCF HDL 6 / 2 x RCF 8006 /2 x QSC KW181 / DBX Drive Rack PA2 / Mixer / 4 x Microphones
6 x RCF HDL 6 / 2 x RCF 8006 / 3 x QSC KW181 / DBX Drive Rack PA2 / Mixer / 4 x Microphones
6 x RCF HDL 6 / 2 x RCF 8006 + 4 x QSC KW181 / DBX Drive Rack PA2 / Mixer / 4 x Microphones
6 x RCF HDL 6 / 2 x RCF 8006 + 4 x QSC KW181 / 1 x QSC K12.2 / DBX Drive Rack PA2 / Mixer / 4 x Mics
6 x RCF HDL 6 / 2 x RCF 8006 + 4 x QSC KW181 / 2 x QSC K12.2 / DBX Drive Rack PA2 / Mixer / 4 x Mics
6 x RCF HDL 6 / 2 x RCF 8006 + 4 x QSC KW181 / 3 x QSC K12.2 / DBX Drive Rack PA2 / Mixer / 4 x Mics
6 x RCF HDL 6 / 2 x RCF 8006 + 4 x QSC KW181 / 4 x QSC K12.2 / DBX Drive Rack PA2 / Mixer / 4 x Mics

2 PAR cans with high-intensity RGBW LEDs and 2 Derby lights.

Comes with 6 LED light eyes, UV LED light all in one party light.

Comes with 24 x 5mm LEDS. White, red, blue and green Strobe Effect

A combination of fog / smoke and coloured light, 3 LED lights

Lightweight, and 45W mini-moving head. Operates in auto and sound modes.

12W bright LED moving head, lightweight and small. Auto and sound modes.